


Hi there,
I started my 3d printing journey in 2020 when Creality Ender 3v2 was a popular budget-friendly printer. So my first printer was Ender 3v2. I learnt basics with that awesome machine. But now in 2024, the story is different. The 3D printing field is highly changing, and many manufacturers made different types of printers with rich features. Here is the best budget-friendly printer from Creality called Ender 3v3 KE. you can purchase this printer for just 279$ or 24000rs that’s the same price for Ender 3v2 in 2020. I said this printer is the best budget-friendly printer here is why. It has a 500mm/s speed with 8000mm/s² acceleration. Fully hands-free Auto bed levelling, 4.3inch colour touch screen, app and software printer control, 300°C 60w ceramic hot end which supports multi-material filaments, direct drive extruder and a lot more. No other printer has this many specifications in this price range. So let’s see the full details of the creality ender 3v3 KE 3D printer. Let’s get started
| Max Extruder Speed | 500 mm/s |
| Max Acceleration | 8000 mm/s² |
| Build Size | 220*220*240mm |
| Max Extruder Temperature | 300°C |
| Max Platform Temperature | 100°C |
| Printing connection | Wi-Fi, USB |
| Display | 4.3-inch, Colour LCD touch |
| Bed levelling | Full-auto one-click levelling |
| Power Supply | AC 100~240V,50/60Hz,350W |
| Camera | NO |
| Filaments | PLA, PETG, ABS, ASA, TPU |
| Others | filament sensor, Ceramic hotend |

So the Ender 3v3 KE comes in this cardboard box. The dimensions of this box are about 500×400×280 mm After opening the box first we can see some accessories which include a manual and some tools in a plastic bag next is another plastic bag full of tools and some filament then we get the power cord, next is the spool holder frame then the display and finally the spool holder. Below the foam sheet, we can see the printer. The printer comes in two parts. First is the xz axis frame with extruder and second is the main body.
Here is the base body which is made with high-quality metal. The power input socket and switch are on the side. The y-axis is belt-driven and guided with two frames. There are two groves for fitting the top frame. we can’t find any knobs for adjusting the Bed level and we can see that this is a loadcell-based auto levelling bed.
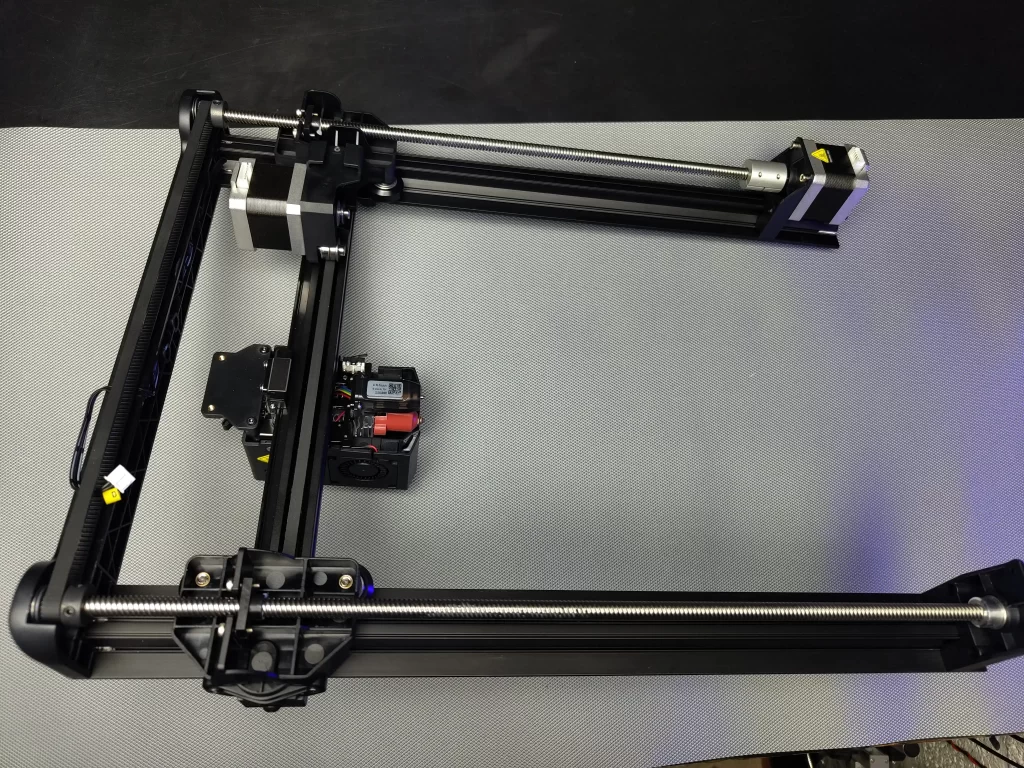
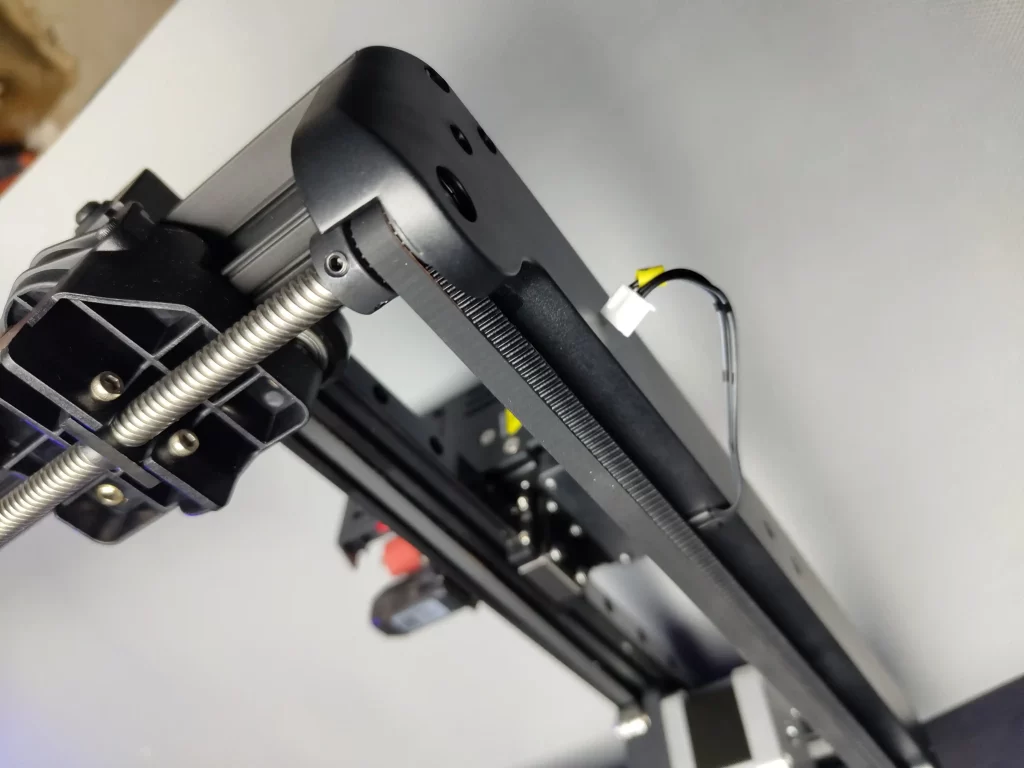
The z-axis is supported by two rods which are connected and synchronised together using the belt. X-axis linear rail is also upgraded which will help to move smoothly.
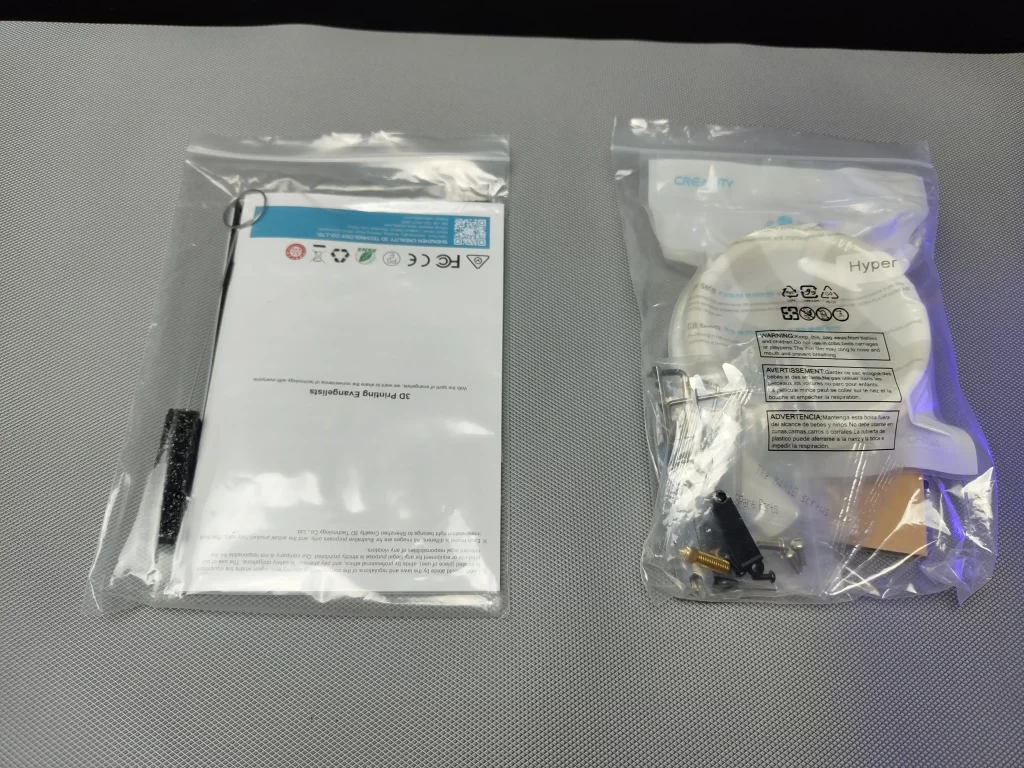
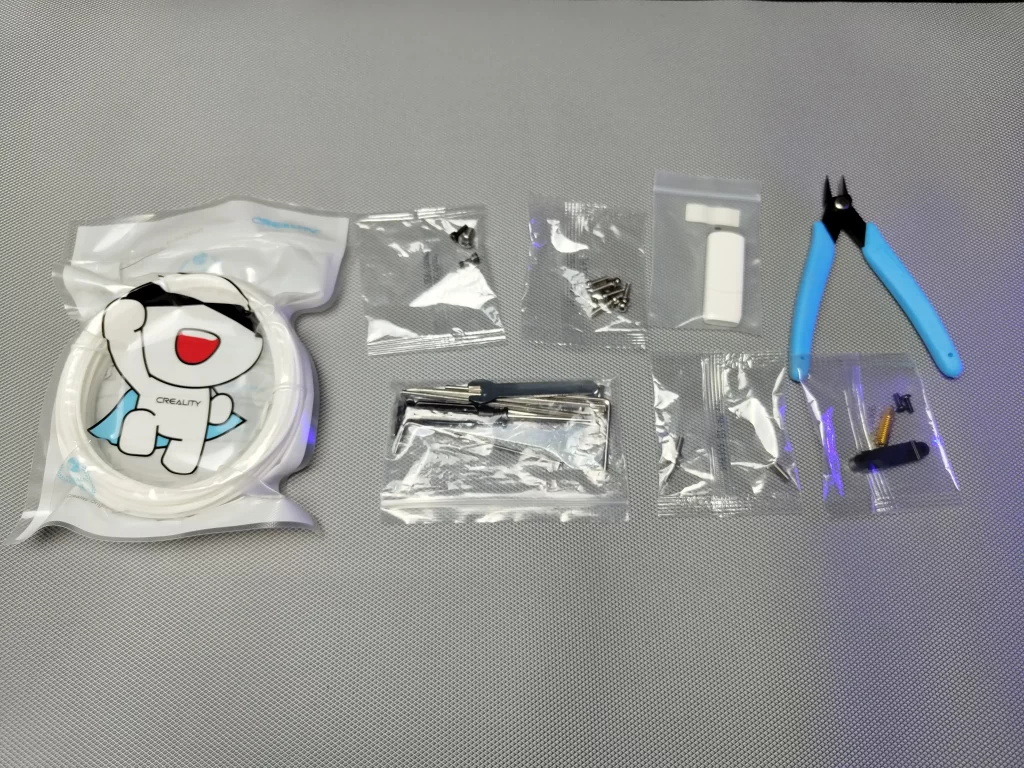
Now let’s open the plastic bags. In the first one, we got a de-clogging tool and some manuals. In the second pack first, we got the hyperPLA sample, some bolts, a cutter then some spanners and Allen keys, again more bolts then a pendrive and some more bolts and a nozzle. The filament holder frame came with the filament runout sensor which is very interesting
Now let’s assemble the printer first let’s place the top frame in the base. While placing give some extra care to the wires. After placing we can secure them. After that connect the wire. Next, we need to secure the z-axis to the base
Now let’s fix the display to the base this display has two USB ports which are for the USB drive and camera on the back side we need to connect the display cable. After fixing the display let’s fix the filament spool holder to the frame. Then connect the filament sensor to its socket.
Next, we can connect the extruder ribbon cable. Then we can secure that with an adaptor. After that, I connected the z-axis motor and x-axis motor we can adjust the y-axis tension using this screw. also, we can set the x-axis tension using the screw. Now our printer assembly has been completed and it took only 10 minutes for me. This printer has 220*220*240mm build volume.
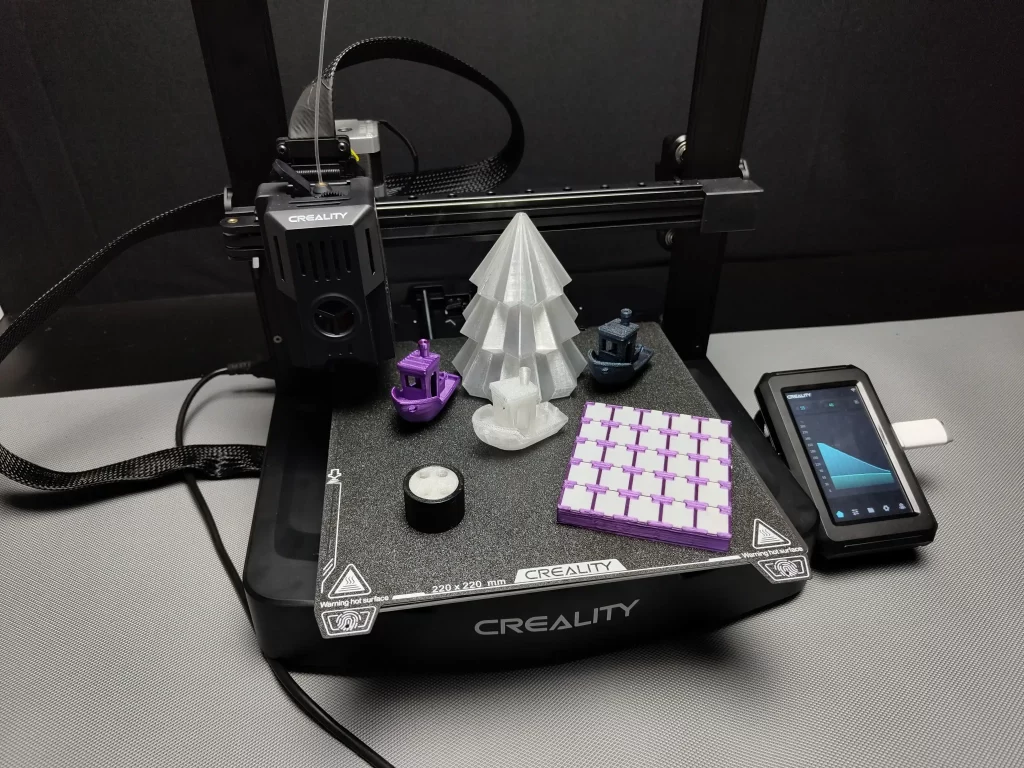
Now let’s remove the extruder cover and let’s see what’s inside. We can see the creality direct drive sprite extruder and ceramic nozzle and it has a high-speed fan also. The heating element and thermistor are placed on the extruder so We can easily replace the nozzle. Great design. On the extruder cover, there are 2 fans to cool the printing model. This is necessary for a high-speed printer. This is the 220*220mm flexible pei build plate it has 2 slots on the back so we can simply align it to the bed.
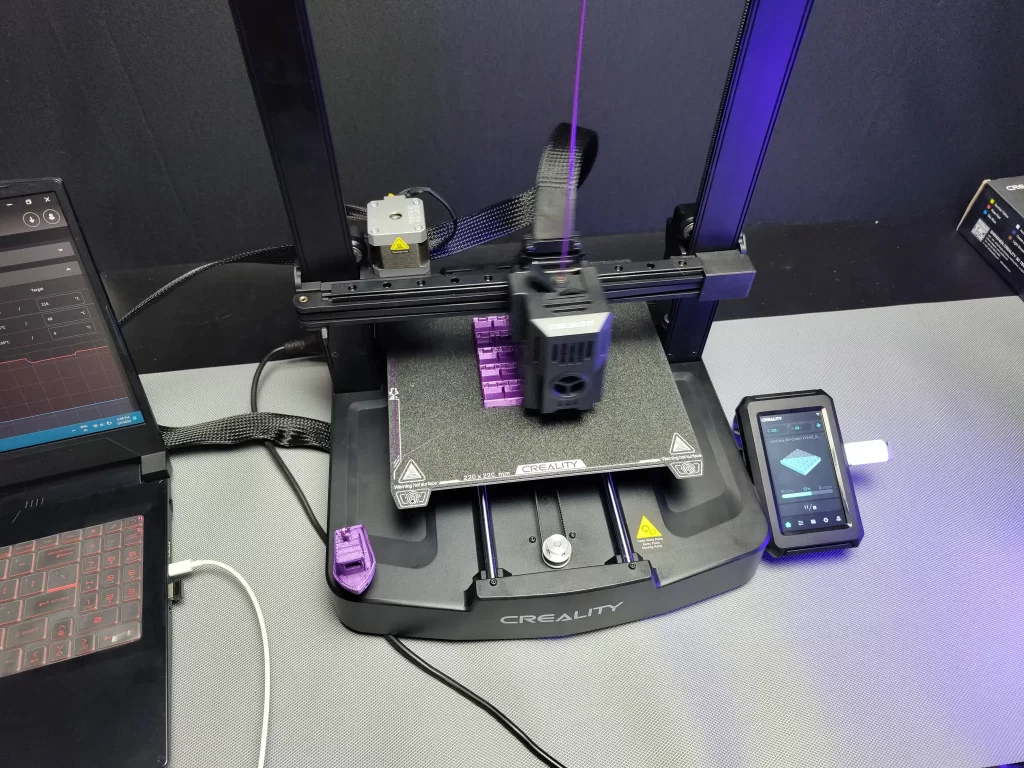
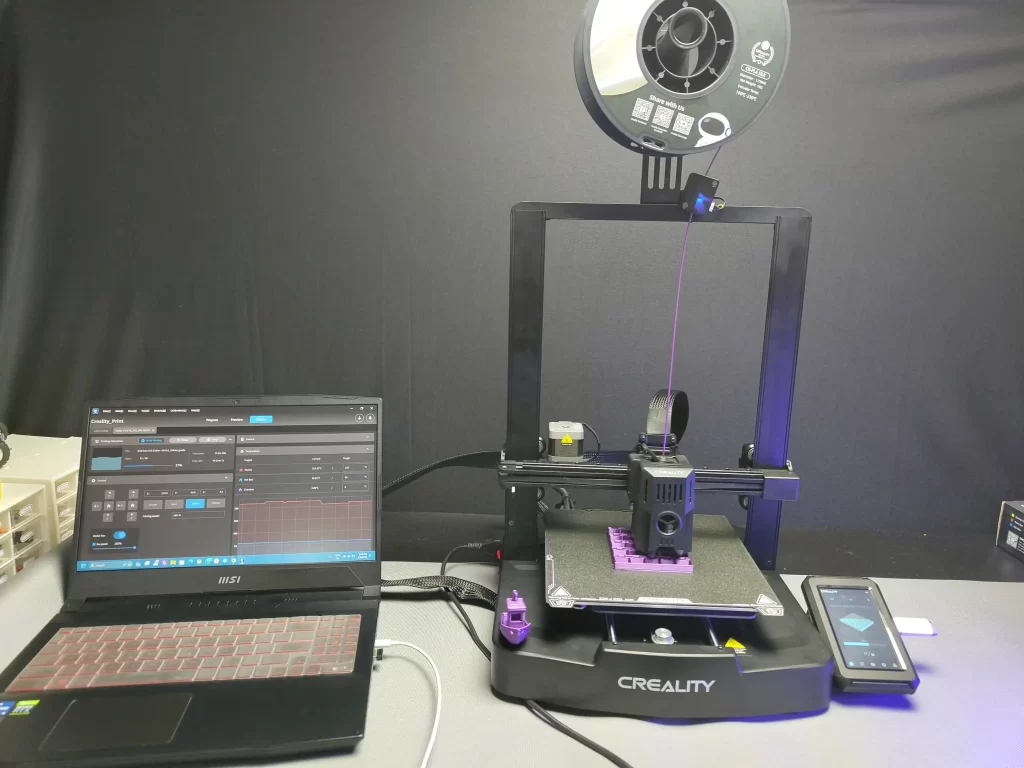
after turning on the printer, now you can see the creality logo on display after booting select the language, we can connect the printer to a network. After that, the printer will perform some self-tests which include nozzle heating, bed heating, nozzle cleaning, and setting the z offset etc. Then the printer will perform the auto-leveling process. The printer will check the levels of the bed in a 5*5 mesh. Now let’s load the filament. I have inserted the filament through the sensor. Then I heated the nozzle and just inserted the filament into the extruder. After loading the filament let’s print the bench. Now you can see the printing. This printer is superfast and the printing is perfectly okay. It took only 16 minutes for the benchy. This is the benchy the quality is amazing no stringing no defects great job. On the display, we can see and set all the printing parameters. The display is very smooth and responsive. We can directly send models to the printer using a creality print slicer also we can monitor and control through the software. While printing the printer will make a 60db sound. And that’s okay for a non-closed fast printer. We can also control and print models using creality mobile app. Now I am printing with flexible TPU filament and the output is perfect. You can see the printing output I never expected this result from an open printer. Next is PETG this is also comes out perfectly. We can also add some extra attachments to the printer line camera and vibration sensor.
| PROS | CONS |
| High speed | Sometimes bed levelling fails |
| Multi-Material support | |
| High-quality Output | |
| Application printer control | |
| Budget-friendly |
So In a nutshell this ender 3v3 KE can produce high-quality quality super fast multi-material prints without failure, the online monitoring and control give much more freedom while printing a model. The colour touch display, flexible pei sheet, filament sensor and auto levelling work perfectly without any problem. So all in all I can say this is the best budget-friendly 3D printer for all. Great job creality. Please check the link for more details.
Leave a comment